


Quick Look: Admin Center > Objects and rules > Tickets > Ticket statuses
Admins and agents in custom roles with permission can create new ticket statuses to indicate a more granular or meaningful status.
Before you can create new ticket statuses, you must enable custom ticket statuses. Once this happens, you can start creating and using new ticket statuses.
Note: Agent Workspace must be activated before you can enable custom ticket statuses. See About the Zendesk Agent Workspace.
Make sure to review the Feature Limitations for the EAP to understand the supported features before enabling ticket statuses.
This article includes these sections:
- Enabling and disabling ticket statuses
- About ticket statuses and status categories
- Other features affected by ticket statuses
Related articles:
Enabling and disabling Ticket Statuses
You must be an admin to enable or disable ticket statuses.
To enable Ticket Statuses
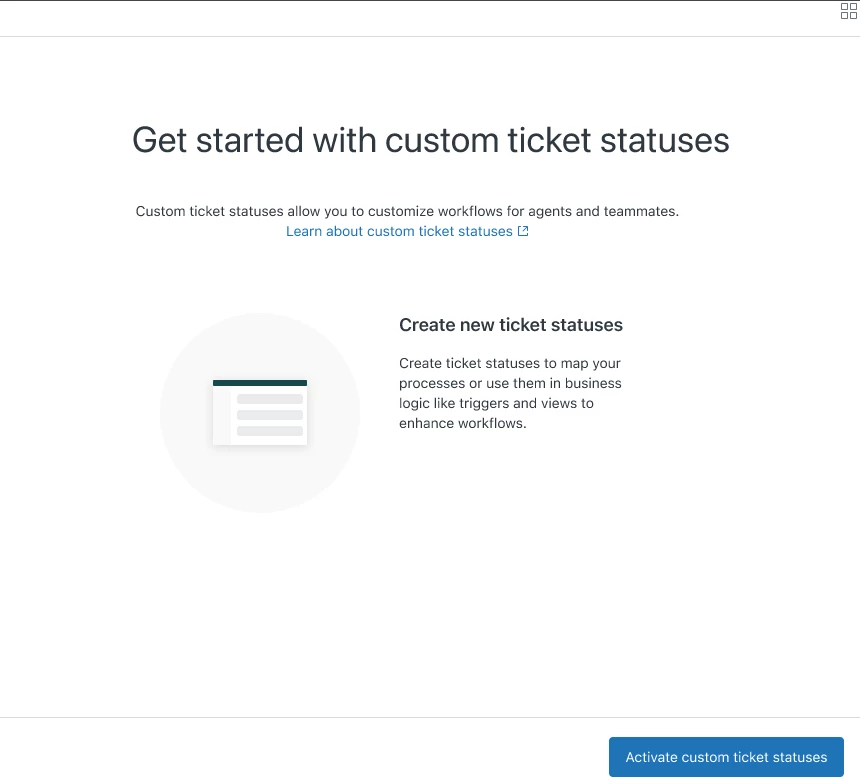
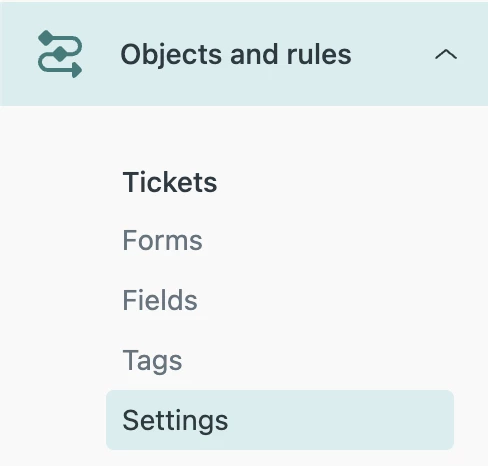
- In Admin Center, click the Objects and rules icon (
 ) in the sidebar, then select Tickets > Ticket statuses.
 - Click Activate custom ticket statuses.
You may want to review your business rules, macros, and views based on legacy ticket statuses and make sure you’re happy with how they’re updated (see Using ticket statuses in business rules, SLAs, macros, and views).
Now you're ready to create new ticket statuses (see Creating ticket statuses).
To disable Ticket Statuses
- In Admin Center, click the Objects and rules icon (
 )in the sidebar, then select Tickets > Settings.
 - In the Customize Ticket Statuses section, deselect Enable.
- Click Save tab.
The status of your tickets are updated based on status categories. For example, if you created a new ticket status called Open investigating in the Open status category, assigned it to several tickets, but then disabled ticket statuses, the status of all those tickets is changed to Open.
- Review your business rules, macros, and views based on ticket statuses. You may need to make some adjustments.
For example, any instances of the Status category and Ticket status condition in your triggers will be converted to the Status condition.
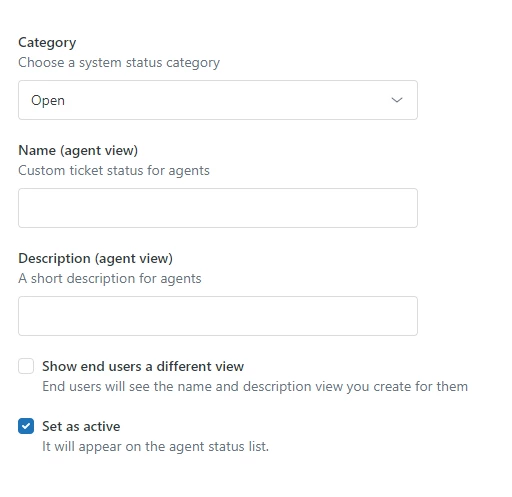
About ticket statuses and status categories
When you enable ticket statuses, the existing ticket statuses (New, Open, Pending, On hold, Solved, Closed) become status categories. A status category is a logical group of similar ticket statuses; it includes at least one default ticket status and can include multiple ticket statuses.
Each status category includes a default ticket status, which is used by your default triggers. Status categories, and the initial default ticket statuses inside of each status category, are named after the system ticket statuses.
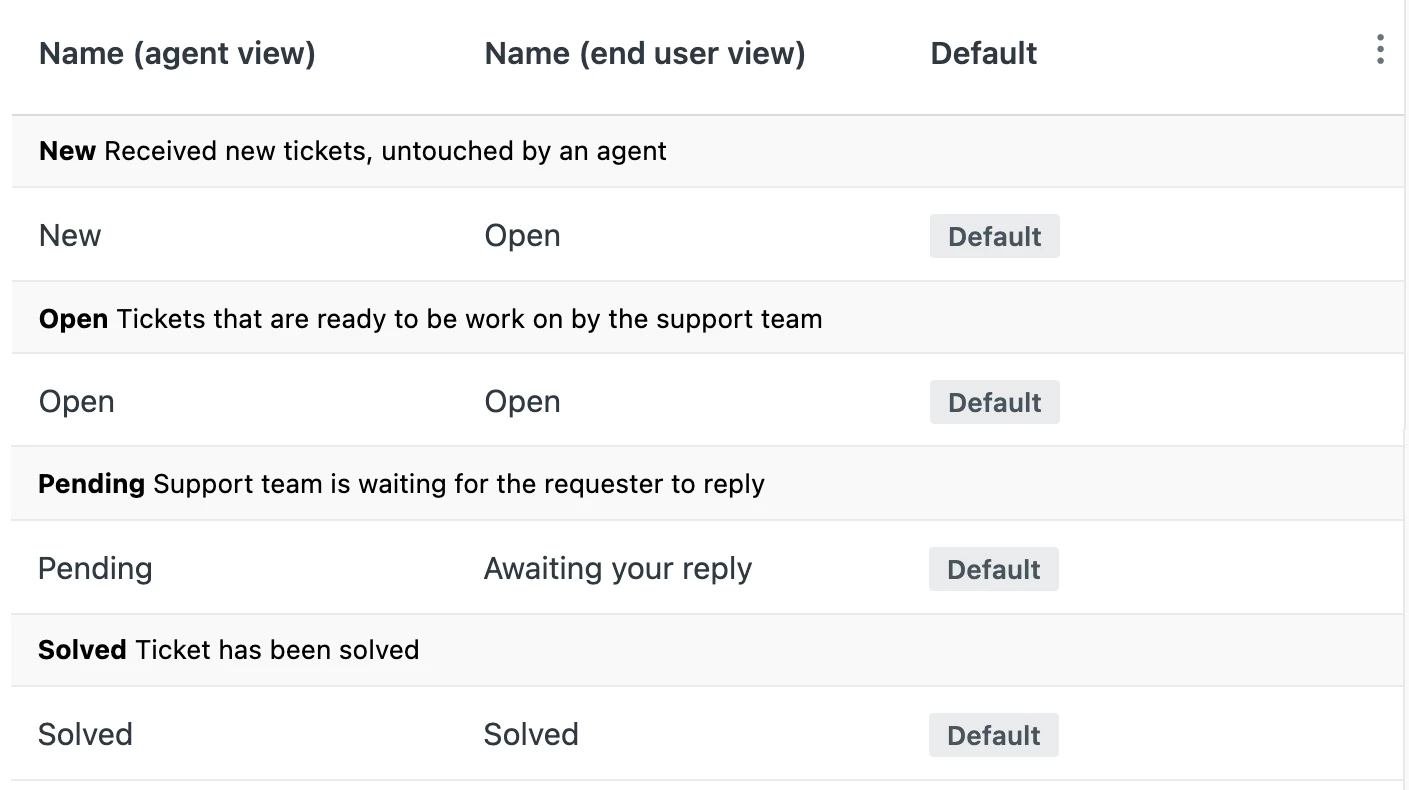
You can change the default ticket status of a status category, if needed. Every ticket status, including the system ticket statuses and ticket statuses you create, belongs to a status category. You can’t create or edit status categories, and you can’t move ticket statuses from one status category to another.
Other features affected by ticket statuses
When you enable ticket statuses, you and your agents will see a variety of small changes to other features, including:
- Selecting a status from the status picker in the ticket interface
- The appearance of ticket statuses in views
- Searching for tickets based on ticket statuses
For information about the agent experience with ticket statuses see Updating and solving tickets.
Additionally, any existing triggers, automations, macros, and views that use a system ticket status condition or action will be affected (see Using ticket statuses in business rules, SLAs, macros, and views).
If you signed up for the EAP and provided your subdomain I believe you can use the same sign-up method and just provide your Sandbox subdomain instead.
That way the PM's managing this EAP can enable it on the correct account.
I hope this helps!