New Request Page - Dropdown to Buttons? | Community
Skip to main content

New Request Page - Dropdown to Buttons?

  • August 27, 2023
  • 6 replies
  • 0 views

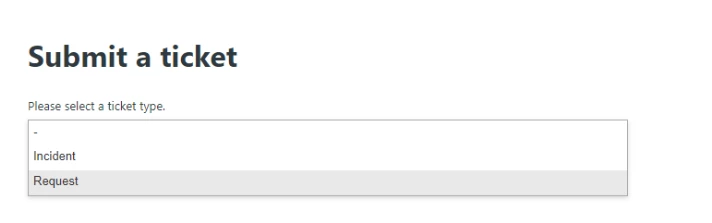
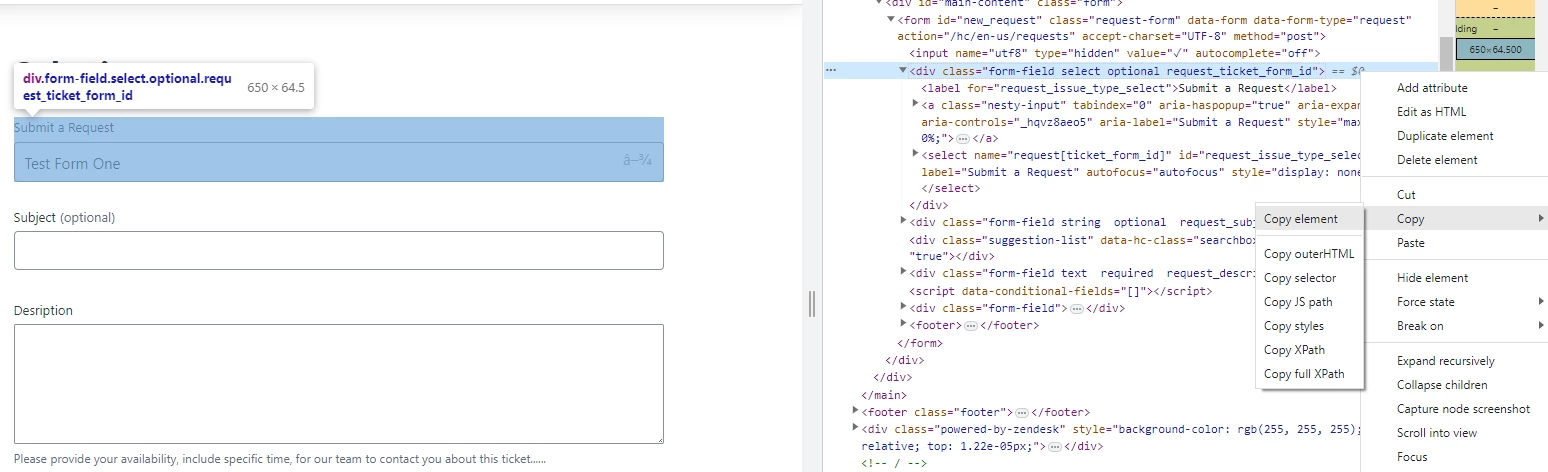
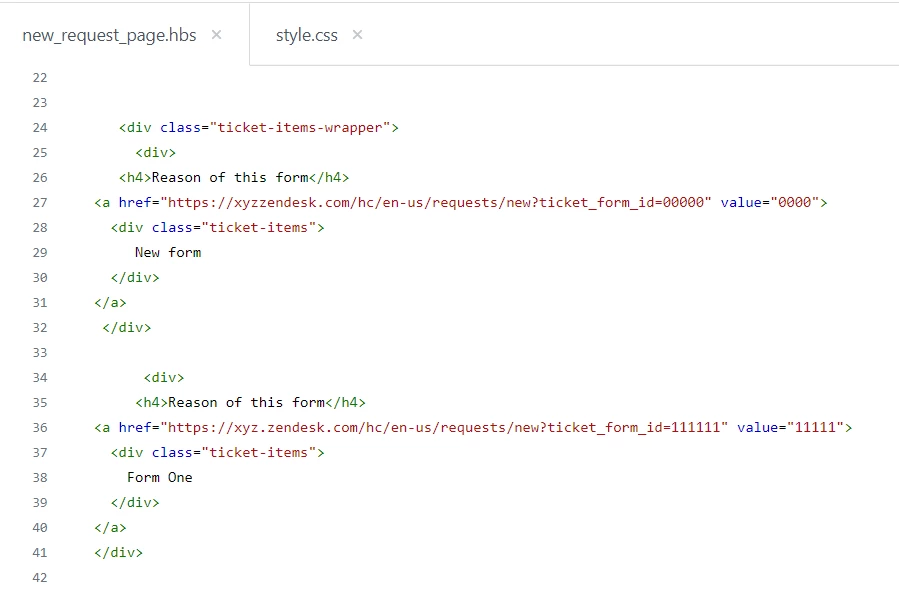
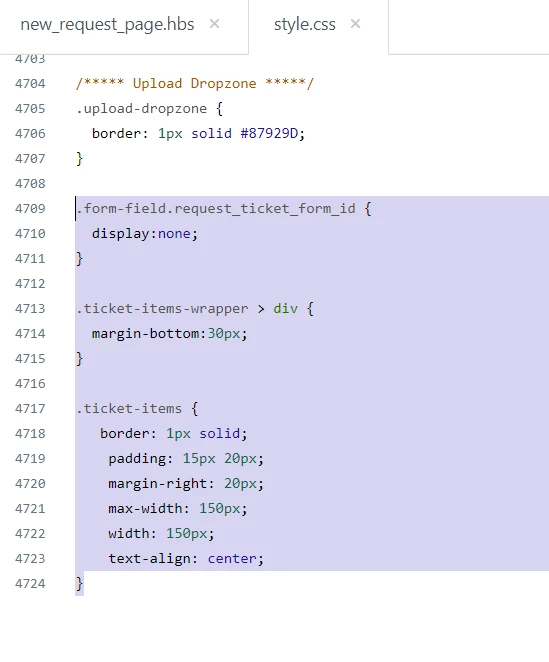
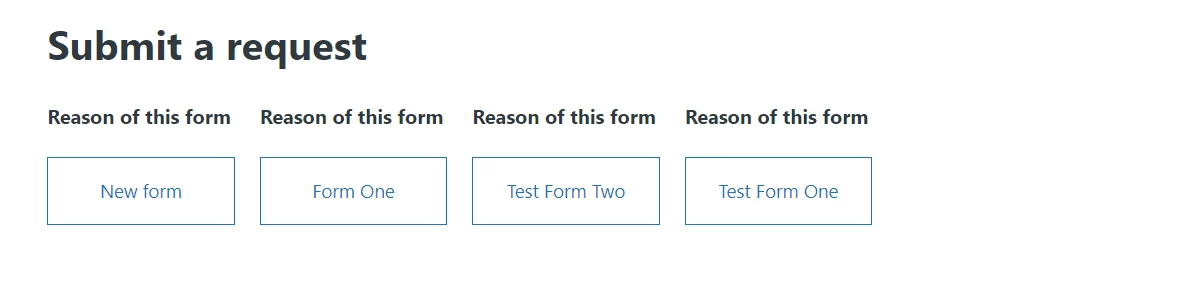
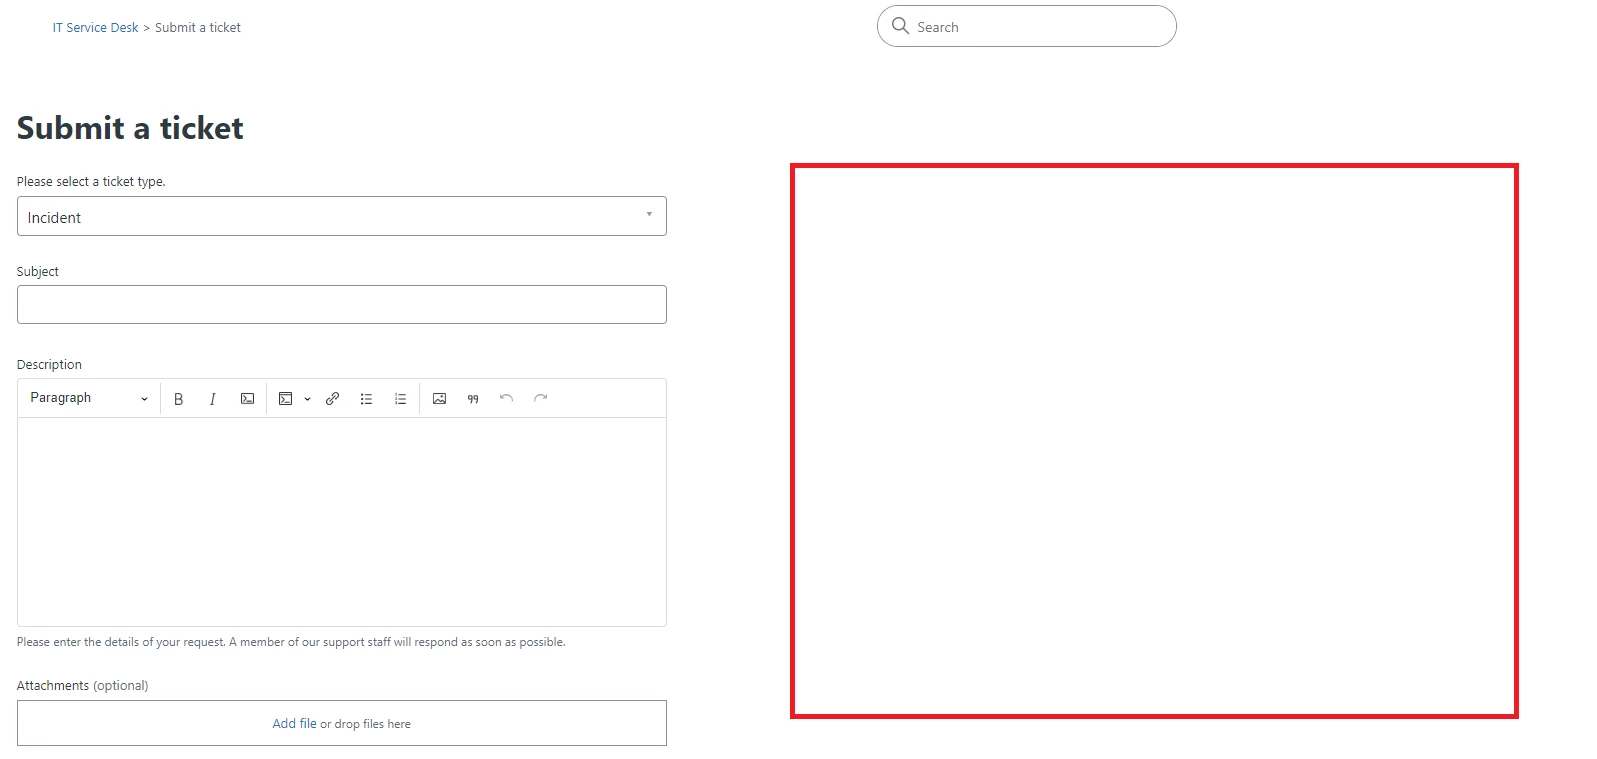
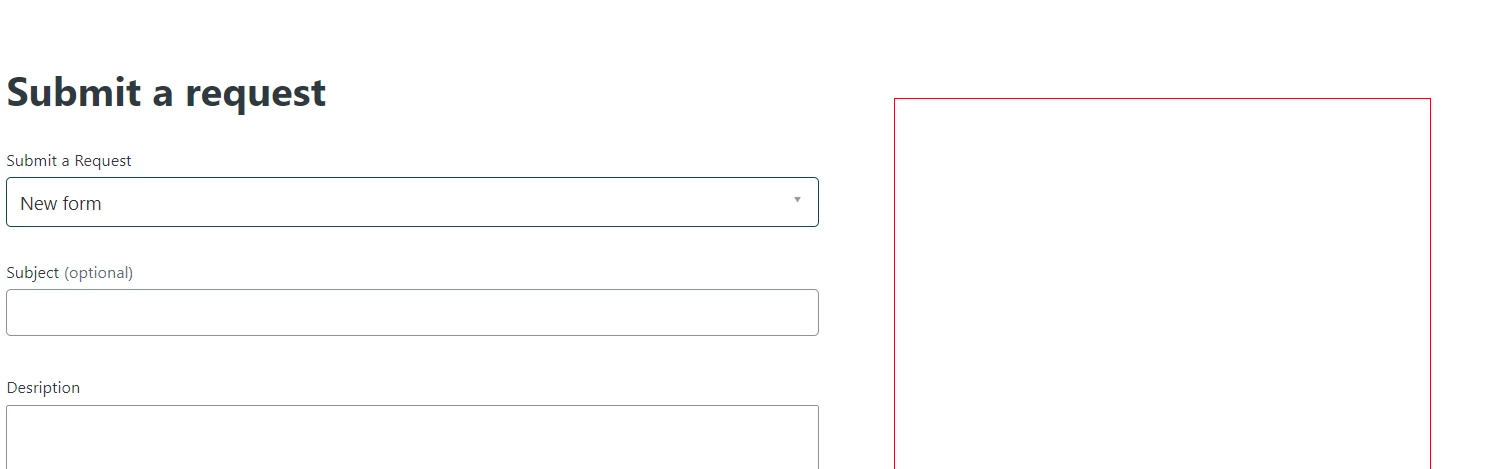
Hi, I was wondering if its possible to change the 'New Request Page' on Copenhagen so that instead of a dropdown it would just show buttons for Incident and Request forms? Also, can I add an additional text box that would explain what each button is for? Sorry I don't have any coding experience!

6 replies

Ifra
  • August 28, 2023

Hi Jamie Cross,  I only can guide you and give some code but you need to customize the code.


Open your request page preview and right click of mouse and copy the form dropdown code:


In other words, copy your form dropdown code and paste that to your new_request.hbs page and then change the options into anchor tags as I'm sharing the screenshot here you can see how I did it.

new_request_page.hbs File

<div id="main-content" class="form">
    
     
     <div class="ticket-items-wrapper">
       <div>
     <h4>Reason of this form</h4>
  <a href="https://xyzzendesk.com/hc/en-us/requests/new?ticket_form_id=00000" value="0000">
    <div class="ticket-items">
       New form
    </div>
  </a>
   </div>
      
        <div>
       <h4>Reason of this form</h4>
  <a href="https://xyz.zendesk.com/hc/en-us/requests/new?ticket_form_id=111111" value="11111">
    <div class="ticket-items">
      Form One
    </div>
  </a>
  </div>
        
        <div>
        <h4>Reason of this form</h4>
<a href="https://xyz.zendesk.com/hc/en-us/requests/new?ticket_form_id=22222" value="222222">
  <div class="ticket-items">
    Test Form Two
  </div>
</a>
 </div>
     
       <div>
        <h4>Reason of this form</h4>
<a href="https://xyz.zendesk.com/hc/en-us/requests/new?ticket_form_id=333333" value="33333"> 
  <div class="ticket-items">
    Test Form One
  </div>
</a>
      </div>

    </div>


    {{request_form wysiwyg=false}}
    </div>


After custoizing thecopied code, I added some CSS to make UI.

style.css File

.form-field.request_ticket_form_id {
  display:none;
}

.ticket-items-wrapper > div {
  margin-bottom:30px;
}

.ticket-items {
   border: 1px solid;
    padding: 15px 20px;
    margin-right: 20px;
    max-width: 150px;
    width: 150px;
    text-align: center;
}


Output is:


Hope it will help you :)

Thanks


Brett13
  • Community Manager
  • August 28, 2023

This is amazing. Thanks for sharing @ifra!


  • Author
  • August 28, 2023

@ifra, Thank you for this! I was also wondering how I could add some text to the right side of the screen (Where the red box is) explaining the difference between an Incident or request?


Ifra
  • August 29, 2023

Thanks Brett Sir !


Ifra
  • August 29, 2023

Hi Jamie Cross,

you will have to add some cusom code to achive this, see HTML divs which I added yet:


Note: you can use this class "right-side-section" with the CSS or JS if you are going to do something with the blank div which is right side as you shared above and you can add id="outer-div-wrapper" with the class.

Ex.


After adding some custom divs in the HTML code , I added CSS for th UI:

.main-wrapper {
  display: block;
  width: 100%;
  flex: 1 0 100%;
}
@media (min-width:768px){
  .main-wrapper {
    display: flex;
  }
}
.main-wrapper > div {
  flex: 1 0 650px;
}
.main-wrapper > .right-side-section {
   flex: 1 0 100%;
   margin-left:0;
   margin-top:30px;
   border:1px solid red;
}
@media (min-width:768px){
.main-wrapper > .right-side-section {
  flex: 1 0 35%;
margin-left:30px;
 }
}


Screenshot for the same:


Output is:


Note: Red border is not permanent, you can hide it from the CSS code.


  • Author
  • August 29, 2023

@ifra Thank you! :)