How to make the Guide hero section as a slider? | Community
Skip to main content

How to make the Guide hero section as a slider?

  • January 17, 2022
  • 3 replies
  • 0 views

Ronit12

Hi there,

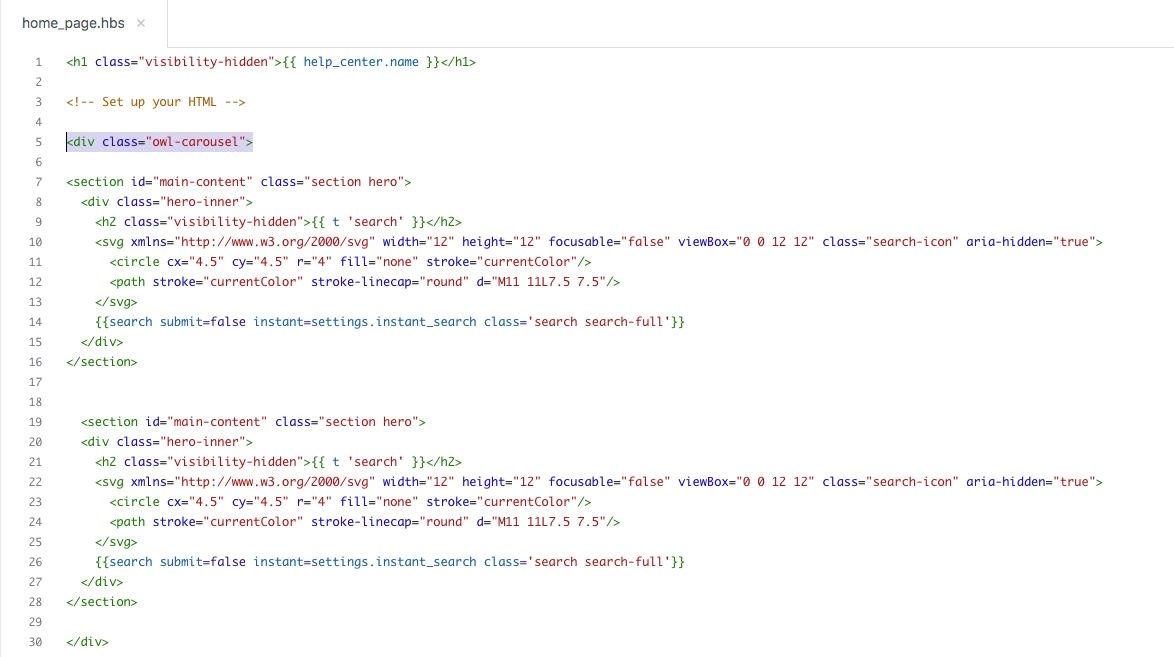
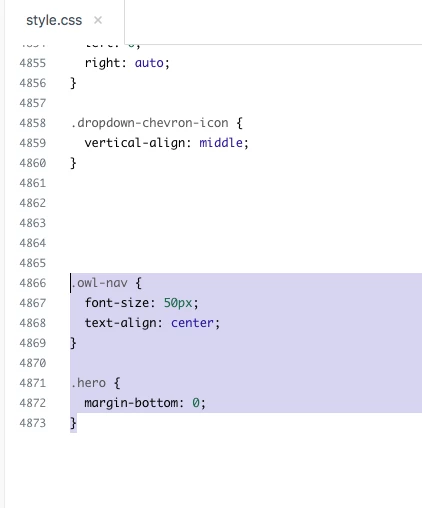
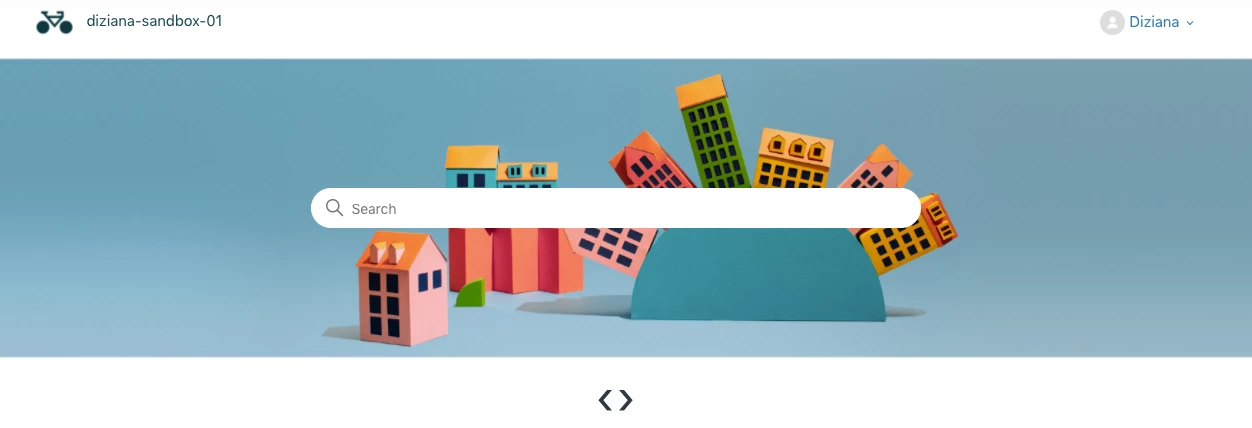
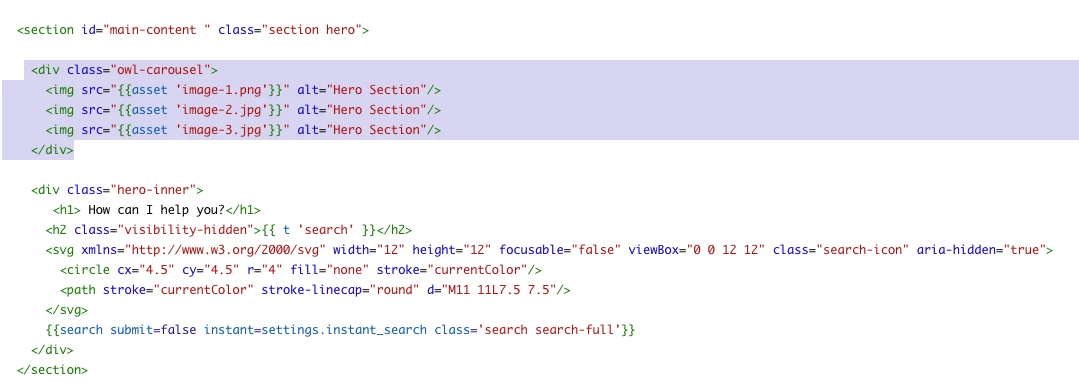
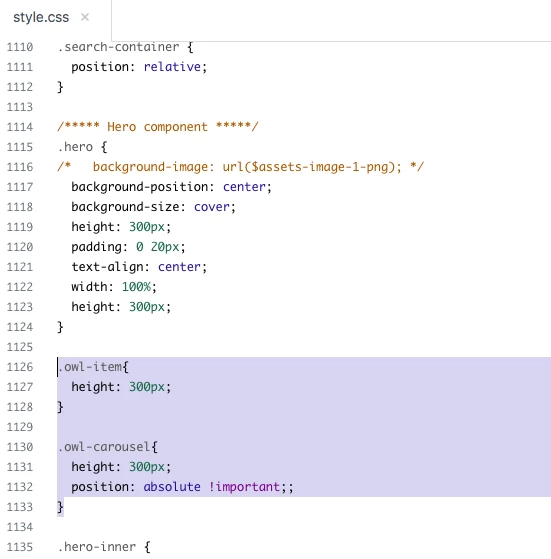
I am looking is there any possibility to make the guide hero section a slider instead of having a static image 

I am using Zendesk Default Theme.

Thanks 

Ronit

3 replies

Ifra
  • January 18, 2022

Hello Ronit,

You only need to follow the given simple steps to make the hero section as a slider:


1). Copy the given CDNs to your document_head.hbs file.

<link rel="stylesheet" href="https://cdnjs.cloudflare.com/ajax/libs/OwlCarousel2/2.3.4/assets/owl.carousel.min.css" integrity="sha512-tS3S5qG0BlhnQROyJXvNjeEM4UpMXHrQfTGmbQ1gKmelCxlSEBUaxhRBj/EFTzpbP4RVSrpEikbmdJobCvhE3g==" crossorigin="anonymous" referrerpolicy="no-referrer" />

<script src="https://ajax.googleapis.com/ajax/libs/jquery/3.5.1/jquery.min.js"></script>

<script src="https://cdnjs.cloudflare.com/ajax/libs/OwlCarousel2/2.3.4/owl.carousel.min.js" integrity="sha512-bPs7Ae6pVvhOSiIcyUClR7/q2OAsRiovw4vAkX+zJbw3ShAeeqezq50RIIcIURq7Oa20rW2n2q+fyXBNcU9lrw==" crossorigin="anonymous" referrerpolicy="no-referrer"></script>


Screenshot:


2).  Add the given script code to your script.js file at the bottom area.

$(document).ready(function(){
$('.owl-carousel').owlCarousel({
loop:true,
items:1,
margin:0,
autoplay:true,
autoplayTimeout:3000,
autoplayHoverPause:true,
responsiveClass:true,
nav:true
})
});


Screenshot:


3). Wrap your hero section HTML inside the wrapper div -

<div class="owl-carousel">  -- hero section HTML --  </div>


See how I did, I added the hero section two times inside the wrapper - <div class="owl-carousel"> ---- </div>.


4). Here, you need to add classes for each hero DIV background image.


5). Add hero area background image. Copy the below CSS code and paste to your style.css file.

.hero-slider-image-one {
background-image: url(https://theme.zdassets.com/theme_assets/1762844/eabf50894a56b2eb7b2c5b5dac193b307d3aeccc.jpg);
}

.hero-slider-image-two {
background-image: url(https://theme.zdassets.com/theme_assets/1274902/e8671b2629a56a2a58bdce403940f55557d1dc6b.jpg);
}

Screenshot:


6).  Add the given CSS code to your style.css file at the bottom:

.owl-nav {
font-size: 50px;
text-align: center;
}

.hero {
margin-bottom: 0;
}

Screenshot:


Output:  The image is automatically sliding, but you can change its behaviour via JS.


Go to the script.js file and change true to false.

$(document).ready(function(){
$('.owl-carousel').owlCarousel({
loop:true,
items:1,
margin:0,
autoplay:true, //it can be false to stop sliding automatically
autoplayTimeout:3000, // sliding timing can be changed
autoplayHoverPause:true, // Image would be stopped, when you mouse hover over the image
responsiveClass:true,
nav:true
});
});


If any confusion, do let me know :)


Thanks

Team Diziana


Ronit12
  • Author
  • January 19, 2022

Ifra, I think you don't understand the purpose of slider I need only to slide the background image not the whole hero section


Ifra
  • January 19, 2022

Okay, so here are some points to update:


1).  Upload your images into the assets folder.


2). Now, add those background images to your hero section.


3). And, add the CSS code as I added.

.owl-item{
height: 300px;
}

.owl-carousel{
height: 300px;
position: absolute !important;;
}


Screenshot for the same: